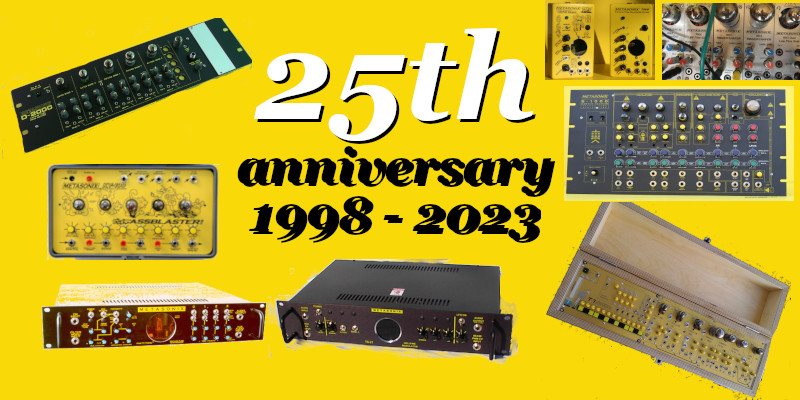
Main Menu
Home
FAQ - Read First!
Forum: Electro-music
Forum: Synthtopia
Forum: Muff Wiggler
_______________
Eurorack Modules:
R-51
R-52
R-53
R-54 Supermodule
COMING SOON: R-60 Self-Tuning MIDI-CV Interface
_______________
KV-100 Multieffect
S-1000 Synthesizer
D-1000 Vacuum-Tube Drum Machine
_______________
How To Order
Support
Consulting
Service
Related Links
Contact


THE METASONIX KV-100.

LET IT BLAST YOUR RECTUM CLEAN.

DEMOS:

Here are some audio demos using the prototype, courtesy of The Wretch:

KV-100 mangling SH-101

KV-100 mangling Machinedrum

KV-100 mangling guitar

KV-100 owner's manual, PDF


The Metasonix KV-100 is not called the "Assblaster" for nothing. We've taken all of our knowledge of extreme vacuum-tube audio processing and combined it into a single convenient, easy-to-use package. Inevitably, the end of the TM series will cause shit-eating, ass-fisting  guitar players to whine about how "underappreciated" they are. So, we're feeding them a foot-long fecal sandwich of audio penis.


It's complete with disgusting and juvenile cartoon art by Dave Lovelace, of Retarded Animal Babies fame.


The KV-100 contains the following:

--five goddamn real new-old-stock VACUUM TUBES.
--the basic preamp stage of our TM-7 Scrotum Smasher, driving:
--the waveshaping (pulser) and ring modulation functions of our TM-1, minus the ring-modulator carrier oscillator, which then drives;
--a VCO derived from our TM-3 (it is NOT intended for use as a synthesizer pitch source, only as a special effect for signal degradation), leading to;
 --an all-new wide-sweeping bandpass filter,  with envelope filter function plus wah capability (external pedal);
--plus an envelope follower, which also makes a gate signal;  
--and a noise gate on the output, which is always active and is driven by said gate signal.


Plus relay-based true bypass for the main circuit, plus relay controlled activation of the VCO and pulser. Controllable with manual switches or external Fender-type amp footswitches.


Plus plenty of processing inputs and outputs for control voltages. No MIDI, dammit.


Only 8 knobs allow for vast ranges of distortion and effects, from subtle to flaming-enema. It's for those filthy, nutsack-sucking guitarists. Because they deserve, and love, flaming enemas.


Yes, you can plug your damn guitar into it, Yes, you can plug line-level sources into it. Yes you can run the output to a guitar amp or any mixer. Yes, all the inputs and outputs are compatible with modular synthesizers.


No, it's not sorta-kinda-like a Line 6 anything. No, it's not a tube-man version of a Digi-Tech or Boss any-damn-thing. No, for the ten-millionth time, it won't make you play like Steve Vai, ass-sucker. I'm getting really sick of feeding sarcasm to the geeks who own 40 bootleg Korn albums and read Guitar World with their lips moving. (They say things like "Dude, I bought them off a guy in the public toilet, he said they wuz real!") There's so many of them, and they are so brainless, I could type anything here and they'd never know or understand. One would think that after our TX-1 Agonizer, TX-2 Butt Probe, and TM-7 Scrotum Smasher, they would know better than to ask stupid questions. Feel free to gnaw the crust off my taint, Tiny Worm Guitar Dude. Jeff Beck is dead, and you're a fairy boy wearing pink satin panties and a matching bra. Your mother's penis is bigger than yours. And your father is a duckbill platypus. Have a nice day, scroad.


Specifications: Audio input accepts unbalanced guitar, microphone or line signals. Output 600 ohms unbalanced. 1/4" jacks for all I/O. Extra inputs: carrier audio input for ring modulator, CV inputs for VCO pitch and filter sweep. Extra outputs: envelope CV out, VCO waveform out, pulser waveform out. Frequency response: yes. Distortion: yee-haw. Filter sweep range: <100Hz to >12 kHz. Enclosed in rugged, moisture-resistant ABS utility box with hinged lid, carrying handle and latch. Size with lid closed 12.25"x7.4"x6.5" (314mmx186mmx168mm), weight (minus AC adapter) approx 2 lbs (1.4 kg). Power: 12 volts AC, 50/60 Hz, 1.5 amps. Uses Jameco 167151 AC adapter for power in 120v countries. Power inlet: 2.1mm coaxial jack.


RACKMOUNTING YOUR KV100


Instead of offering a kit, with all the manufacturing hassles, we've decided to show you how to make your own custom KV100 rackmount enclosure.


First, go to Front Panel Express and download their free panel design software. Install according to their instructions.


Then download our .fpd file for the KV100 rack panel here - KV100 Rack Panel FPD file - Click to Download. Run the Front Panel Express software and load the .fpd file. (If desired, you can modify it with a different color, added holes and engraving outboard of the KV100 panel, whatever you wish. See the FAQ on their website for more information.)


Use the FPD software's built-in ORDERING function to order a ready-made panel from FPD. Within 7-10 days your panel will arrive. It will be a beautiful machined aluminum panel, 2.5mm thick and having neatly rounded corners and anodized front and rear.


When you have the panel, take the KV100 out of its plastic toolbox, by removing the four 8-32 screws passing through the gray plastic feet in each corner. (Leave the standoffs attached to the PC board, they are convenient places to attach a rear enclosure if desired, and help protect the PC board against damage. Save all the hardware in case you wish to reinstall the KV100 in its toolbox.)


Carefully slip the KV100 into the big cutout in the panel. It's a tight fit and only goes in one way--you may need to loosen some of the control and jack nuts that hold the KV100's yellow panel to the PCB assembly-- use caution. The two small holes in the KV100 yellow panel (one on each end of the row of tubes) should line up with the holes in the tabs in the rack panel's cutout.


Attach the rack panel's tabs to the KV100 panel with two 6-32 or M3 screws and nuts. If you wish to add a metal strap to protect the tubes, it can be attached with the same screws. Download the PDF file of the drawing below.

KV100 Tube Strap PDF - Click to Download


The 12vAC power can be connected to the KV100 after rack mounting by drilling an extra 10mm hole in the rack panel, connecting the AC adapter to the AC mains inside the EIA rack, then running the connector thru the added hole and plugging it into the power connector. A neater-looking method is recommended, if you're not afraid of soldering irons. Cut the 2.1mm power connector off the AC adapter cord (AFTER UNPLUGGING MAINS POWER, OF COURSE). Separate the two leads, and strip and tin the ends about 5 mm. As shown in the photo below, solder the wire ends to the two pads indicated on the PC board, directly underneath the KV100's power jack. Then you can power the KV100 without any unsightly power cords being visible.


Although the KV100 usually does not require a shielded enclosure for the PCB assembly, one may be added easily. Download the drawing below showing how to fabricate one from galvanized mild steel sheet (recommended, as it gives better magnetic shielding than aluminum). All dimensions are in millimeters so anyone in the world can make this box. If you don't wish to make this box yourself, any local sheet-metal or HVAC shop can make one from the drawing. Attach it to the standoffs on the PC board using 8-32 screws. The box is grounded to the KV100 ground via these standoffs, and the addition of #8 star washers to the screws is recommended to insure a good electrical connection.

KV100 Rear Enclosure diagram PDF - Click to Download

Site built by Michael Weeks, with help from Mambo.